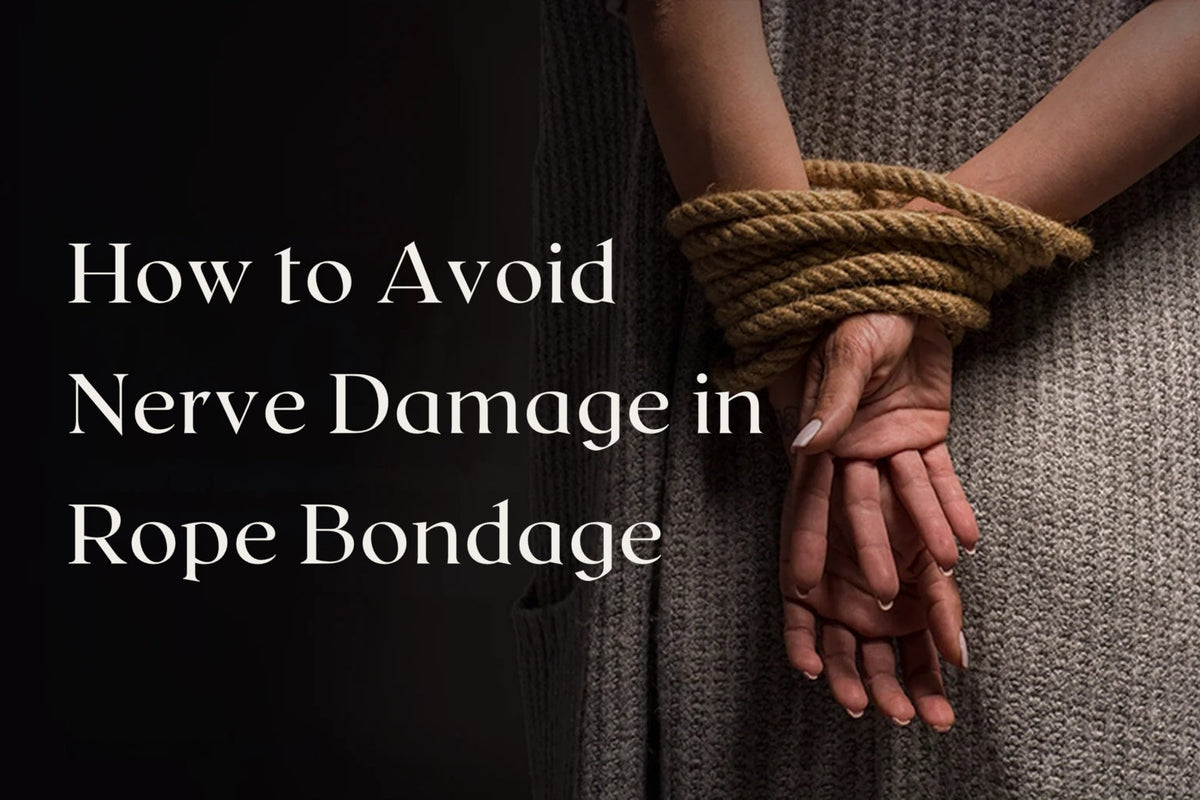
To avoid nerve damage in rope bondage, keep rope off high-risk areas like the upper outer arm, inner elbow, inner wrist, armpit and outer knee; use multiple wide wraps rather than single tight strands; keep tension snug enough to slide two fingers underneath; limit tie times, especially for arms behind the back; and check sensation and movement every few minutes. If numbness, tingling, weakness or shooting pain appears, release the rope immediately. Nerve injuries can happen quickly and take weeks or months to heal, so prevention matters most.
Rope bondage can be beautiful, intimate and intensely connecting. But it carries one risk that every rope enthusiast should understand: nerve compression. Unlike a bruise or rope mark, a nerve injury can affect hand strength, sensation or movement for weeks or even months.
The good news is that most rope nerve injuries are preventable. This guide explains, in practical terms:
- Where nerve damage risk is highest
- The warning signs to watch for during a scene
- Safe tension guidelines
- How long is too long
- What to do if numbness happens
Important: This article is for general education and is not medical advice. If you experience lasting numbness, weakness or pain after rope play, see a healthcare provider.
For a broader introduction to rope gear, see our guide to the best sex toys for rope bondage.
Where Nerve Damage Risk Is Highest
Nerves are most vulnerable where they run close to the skin with little muscle or fat protecting them, and where they pass over bone. Pressure in these spots can compress the nerve against the bone underneath.
High-Risk Areas in Rope Bondage
| Nerve | Where it is vulnerable | What injury can cause |
|---|---|---|
| Radial nerve | Outer side of the upper arm, a few inches above the elbow | Weakness lifting the wrist and fingers (“wrist drop”), numbness on the back of the hand near the thumb |
| Ulnar nerve | Inner elbow (“funny bone”) and the pinky side of the wrist | Numbness in the ring and pinky fingers, weak grip |
| Median nerve | Inner wrist and inner upper arm | Numbness in the thumb, index and middle fingers, weak pinch |
| Brachial plexus | Armpit and upper chest | Widespread arm weakness or numbness |
| Axillary nerve | Armpit and back of the shoulder | Shoulder weakness |
| Common fibular (peroneal) nerve | Outer side of the knee, just below the bony bump | Weakness lifting the foot (“foot drop”), numbness on the top of the foot |
| Lateral femoral cutaneous nerve | Front of the hip, near the hip bone | Numbness or burning on the outer thigh |
| Femoral nerve | Groin crease | Thigh weakness or numbness |
The Upper Arm: The Most Common Risk Zone
The radial nerve wraps around the back and outer side of the upper arm. Chest harnesses and arms-behind-the-back ties often place rope across this area, which is why radial nerve injuries are among the most commonly reported rope injuries.
Prevention tips:
- Keep upper arm wraps lower on the arm or higher near the shoulder, away from the mid-outer arm.
- Use multiple wraps to spread pressure.
- Check wrist and finger extension often.
Wrists and Hands
Single wraps around the wrists can press directly on the median and ulnar nerves. Use wide, multi-wrap cuffs and avoid placing knots on the inner wrist. Padded cuffs, like those in our Leather Bondage Set, spread pressure over a wider area and are a good alternative to rope cuffs for beginners.
Knees and Legs
In leg ties such as frog ties, rope across the outer knee can compress the fibular nerve. Keep rope above or below the knee and avoid knots over the outer knee.
Risk Factors That Increase Vulnerability
| Factor | Why it matters |
|---|---|
| Diabetes or existing neuropathy | Nerves are already more sensitive |
| Previous nerve injuries | Higher chance of re-injury |
| Carpal tunnel syndrome | Wrist nerves already compressed |
| Very lean arms | Less tissue protecting the nerves |
| Alcohol or drugs | Reduced awareness of warning signs |
| Fatigue | Slower response to discomfort |
| Hypermobility | Joints move into risky positions more easily |
Warning Signs During a Scene
Nerve symptoms can appear quickly, sometimes within minutes. Knowing the signs and checking often are your best protection.

Nerve Warning Signs
| Sign | What it may mean |
|---|---|
| Tingling or pins and needles | Early nerve compression |
| Numbness | Nerve is not sending signals properly |
| Shooting or electric pain | Nerve irritation |
| Burning sensation | Nerve irritation |
| Weakness | Nerve compression affecting muscles |
| Trouble gripping or spreading fingers | Possible radial, median or ulnar involvement |
| Wrist or foot drooping | Possible radial or fibular nerve involvement |
Nerve vs Circulation: What’s the Difference?
| Circulation problem | Nerve problem |
|---|---|
| Hands or feet turn pale, red, blue or purple | Color may look normal |
| Feels cold | Temperature may feel normal |
| Swelling | Usually no swelling |
| Dull ache | Tingling, numbness, electric or burning pain |
| Improves quickly when released | May persist after release |
Key point: normal color does not mean everything is fine. Nerve compression can happen even when circulation looks good.
Hand and Arm Checks
Ask the person in rope to do these quick tests every few minutes:
- Squeeze your fingers firmly (grip strength).
- Spread their fingers wide (ulnar nerve).
- Touch their thumb to each fingertip (median nerve).
- Lift the back of their hand upward (wrist extension, radial nerve).
- Tell you whether they feel your touch on the back of the hand near the thumb, the pinky and the palm side of the thumb.
Leg and Foot Checks
- Lift the toes and foot upward (fibular nerve).
- Wiggle the toes.
- Confirm sensation on the top of the foot.
Communicate Clearly
- Agree that any tingling or numbness means “say something immediately.”
- Use a traffic light system: green (good), yellow (check or adjust), red (stop).
- Agree on a non-verbal signal, such as dropping a held object, if the person cannot speak.
Do Not Push Through
Rope enthusiasts sometimes feel pressure to tolerate discomfort. Nerve symptoms are not something to push through. Report them right away.
Safe Tension Guidelines
Proper tension spreads force safely across the body.
Core Tension Rules
| Rule | Why it matters |
|---|---|
| Two-finger rule | You should slide two fingers under each wrap |
| Use multiple wraps | Spreads pressure over a wider area |
| Avoid single tight strands | Concentrate pressure on one line |
| Keep knots off nerves | Knots create pressure points |
| Avoid twisting rope | Twisted rope digs in unevenly |
| Lock wraps | Prevents rope from tightening unexpectedly |
| Re-check after movement | Rope can shift and tighten |
Use Locking Ties
Some knots can tighten as the person moves, pulling tighter around limbs. Use non-collapsing, locking cuffs so rope does not cinch further during play.
Spread the Load
- Use wider rope or more wraps.
- Place pressure on muscle and padded areas, not bony or nerve-heavy spots.
- Avoid loading weight onto a single wrap.
Be Careful With Arms Behind the Back
Ties that hold the arms behind the back (often called box ties or TKs) are popular but carry higher nerve risk because they place rope across the upper arms and strain the shoulders. Beginners should:
- Learn from an experienced, safety-focused educator
- Keep forearms parallel and low, not high on the back
- Keep upper arm wraps loose and away from the radial nerve zone
- Keep tie times short
Tension Changes Over Time
Even a perfectly placed tie can tighten as muscles swell, the body shifts or sweat changes friction. Re-check tension every few minutes, not just at the start.
How Long Is Too Long
There is no universally safe time limit in rope bondage. Nerve compression can occur in minutes if rope is on a vulnerable spot. Time is just one factor alongside placement, tension and position.
General Time Guidance
| Situation | Suggested approach |
|---|---|
| Beginners | Keep ties short, often 10 to 20 minutes, and check every few minutes |
| Arms behind the back | Keep it shorter, especially for beginners |
| Simple wrist or ankle cuffs | Can last longer if checks are normal |
| Load-bearing ties or suspension | Short durations, experienced riggers only |
| Any sign of nerve symptoms | Release immediately, regardless of time |
Factors That Shorten Safe Time
- Rope across a high-risk nerve area
- High tension
- Arms or legs in strained positions
- Body weight resting on rope
- Previous nerve issues or neuropathy
- Cold rooms, which can reduce awareness of sensation
Check Frequency
- Check hand or foot function every few minutes.
- Check more often in arms-behind-the-back ties.
- Check immediately after any position change.
Build Time Gradually
Start with short, simple ties and increase duration gradually as you learn how your body responds. Many experienced rope bottoms know their personal “time limit” for specific ties, which they learned through careful practice.
What to Do If Numbness Happens
If numbness, tingling, weakness or shooting pain appears, act quickly.

Immediate Steps
- Release the rope immediately. Untie the affected area first.
- Cut the rope if needed. Keep EMT-style safety shears within reach for this reason.
- Support the limb as it is released, so it does not drop suddenly.
- Move the person into a comfortable position.
- Encourage gentle movement of fingers, wrists or feet.
- Do not retie the same area during this session.
- Monitor symptoms closely.
What to Expect
| Situation | What it may mean |
|---|---|
| Tingling disappears within minutes | Temporary compression, usually resolves |
| Numbness lasts more than an hour | Possible nerve injury, monitor closely |
| Weakness, such as trouble lifting the wrist or foot | More significant nerve injury |
| Symptoms worsen over time | Needs prompt medical attention |
When to See a Doctor
Seek medical care if:
- Numbness, tingling or weakness lasts more than a few hours
- You cannot lift your wrist, fingers or foot normally
- Grip strength is noticeably reduced
- Pain is severe or worsening
- Symptoms appear in more than one area
Be honest with your provider about what happened. Accurate information helps them assess and treat the injury. Healthcare providers see compression injuries from many causes and are there to help, not judge.
Recovery
Mild nerve compression often improves within hours or days. More significant injuries may take weeks or months. Your provider may recommend rest, splinting, physical or occupational therapy and avoiding pressure on the area during recovery.
Learn From It
After any incident:
- Discuss what happened calmly.
- Identify the cause: placement, tension, time or position.
- Adjust future ties.
- Consider learning from an experienced rope educator.
Aftercare Matters
Nerve scares can be emotionally upsetting for both partners. Offer reassurance, warmth, water and a calm conversation. Check in again the next day. For more on negotiation and aftercare, see our impact play and BDSM guide.
Safer Alternatives for Beginners
If you are new to restraint, start with lower-risk options:
- Wide padded cuffs instead of rope cuffs
- Loose, decorative ties that do not bear load
- Blindfolds and sensation play
Browse beginner-friendly options in our bondage gear collection.
Safe Rope Is Smart Rope
Learning how to avoid nerve damage in rope bondage comes down to knowing the high-risk areas, spreading pressure with multiple wraps, keeping tension snug but not tight, limiting tie times and checking sensation and movement often. If numbness or weakness appears, release the rope immediately and seek medical care if symptoms persist. With knowledge and care, rope can stay what it should be: safe, connected and deeply enjoyable.
All RealCock Toys orders ship in plain packaging with discreet billing, and orders over $99 ship free.